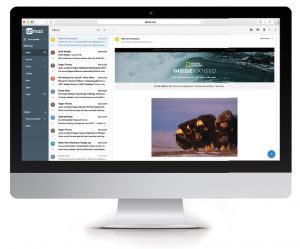
Innovators in Mail server, Webmail and appliance solutions


January 18, 2010

 Compiling PHP 5.3.x for Atmail and ArchiveVault

While tools such as yum, apt-get and pkg_add can make our life a lot easier when it comes to installing PHP and it's extensions (among other things), there is often a time when we need to go the old-fashioned route and compile from source. This brief article explains how to build PHP 5.3.x from source while detailing the configure options required for compiling PHP 5.3.x so that it plays nice with Atmail 6 and ArchiveVault.

General Install Instructions

  1. Download the PHP 5.3.x source from http://php.net
  2. extract into a temporary location on your server, say /tmp
  3. cd into the php-5.3.x/ dir that you just extracted
  4. now it's time to configure the PHP source for the options you want compiled so run this command:./configure --with-apxs2=/usr/sbin/apxs --with-mysql --enable-mbstring --with-ldap --with-pdo-mysql --with-zlib --with-openssl
  5. Once configure has successfully completed run this command : make install

Notes:

  1. You will need to replace /usr/sbin/apxs with the path to your apxs
  2. you may need to install mysql-devel if you run into configure or compile errors relating to the mysql extension
  3. you may need to install the zlib library if you run into errors relating to zlib extension (and may need to point to the location of zlib with --with-zlib=/path/to/zlib)
  4. you may need to install the OpenSSL library if it is not on your system
  5. On some 64bit systems (eg CentOS, RH) you may need to run: ln -s /usr/lib64/mysql/libmysqlclient.so /usr/lib/mysql/libmysqlclient.so

Filed under: Uncategorized, Installation, PHP version, Atmail 6 — Brad Kowalczyk @ 8:14 pm


April 5, 2009

 SELinux and MySQL on the network

If you are using an external MySQL server, and an AtMail installation on an operating system that has SELinux enabled, you might experience the following:

- the installation fails when connecting to the MySQL server
- connecting manually using the mysql command succeeds.

In this case, you need to set SELinux so that it allows HTTP modules to connect to the network. This can be done by executing the following command:

% /usr/sbin/setsebool -P httpd_can_network_connect true 

Retry the installation afterwards.


Filed under: Uncategorized, Applications, Database, Installation, Linux version, Atmail 5, Atmail 6 — John Contad @ 5:53 pm


January 4, 2009

 Installing Atmail mail-server under Ubuntu - Webmail, SMTP/POP3/IMAP, Calendaring, Push and more

The following is a guide to setting up Atmail server in an Ubuntu environment.

First you must become root and install dependencies:

# sudo /bin/bash
(enter sudo password and press enter)
# apt-get update
# apt-get install apache2 php5 libapache2-mod-php5 php5-cli mysql-server mysql-client

Download Atmail php5 server from the atmail website http://www.atmail.com (this will need to be purchased, but an evaluation version can be acquired from here).

Move the downloaded file into /usr/local/

# mv atmailphp5server.tgz /usr/local/

Navigate to /usr/local/

# cd /usr/local

Extract the tarball

# tar xzvf atmailphp5server.tgz

As the tarball extracts, a list of files being extracted will scroll down the screen, wait until you are presented with a prompt, and run the following commands.

# cd atmail
# chmod +x ./server-install.php
# php ./server-install.php

server-install.php

From here, the install is very simple, following the prompts and using default values should lead to a successful installation.
Note that the value inside [ ] square brackets is the default value, you don't need to re-enter it, you can just press enter/return.

When asked if you wish to install all missing dependencies automatically, choose YES.

If you get a message as below:

Simply re-run the server installation with the following command:

# php ./server-install.php

You will need to enter the mysql root password when prompted.

When asked:
"Select the database to use or enter the name of a new database to create:", Enter the name "atmail" as your new database and press enter.

You should get a message that says "Atmail tables successfully created. MySQL setup complete!"

Enable the Groupware Module if you wish, this will enable calendar, address-book and task data sharing.

When Asked:
"Specify the binary location of your Webserver:"
Use default value (/usr/sbin/apache2)

Allow the atmail install to configure your httpd.conf file automatically and restart httpd.

You are now at the point in your Atmail installation where you need to specify a domain name for which you wish to host email accounts. You can also specify multiple domains separated by a comma, for this demonstration I will be setting up domain.com

I entered domain.com as the domain and admin@domain.com as the admin email address, but you should enter your domain and real administrator email address in your install.

Use default values to allow atmail to automatically setup SMTP.

Use default values to allow atmail to automatically setup POP3/IMAP server.
(This will take about 5 minutes, please be patient)

Ensure that you get a message saying:

"@Mail POP3/IMAP Server Installation: Successful
Compile & installation complete"

Use default settings to allow Atmail to install Spamassassin from source.
Ensure you get a message saying:

SpamAssassin Installation: SUCCESSFUL
Now use default settings to install the anti-virus engine from source,

Ensure you get a message saying:

@Mail AV Installation: SUCCESSFUL
Compile & Installation complete

Allow the Atmail installation script to run diagnostic tests, this is a good way to troubleshoot if your Atmail installation did not go as planned.

Should you have any other trouble with this installation, contact Atmail support.

Your Atmail installation should now be complete.

Navigate to http://localhost/mail to view your new Atmail messaging platform login screen,

and http://localhost/mail/webadmin to view and modify your configuration settings.

NOTE: You should read the red text and secure webadmin immediately with a password.

Congratulations on your new, fully functional Atmail server!


Filed under: Installation, Atmail 5 — Luke @ 9:33 pm


July 31, 2008

 Vulnerability fix

A security vulnerability has been discovered which may be used to gain access to sensitive information.
Fix:

chmod 640 /usr/local/atmail/webmail/libs/Atmail/Config.php

Routinely check for any additional patched that have been released.


June 15, 2008

 Installing @Mail 5.3 on Cpanel Server.

This is a guide for those of you who wish to use CPanel as your operating system and would like to install the @Mail WebMail Client only version of @Mail.

1) Before you install: requirements and dependencies

@Mail requires the following software:

* MySQL Libraries - http://www.mysql.com/
* Apache Webserver - Usually installed by default with most Linux Distributions and Unix Variants - http://httpd.apache.org/
* PHP 4.X or newer - http://www.php.net/
* PHP MySQL support - http://us2.php.net/mysql
* Mail Parse extension - PECL :: Package :: mailparse. http://pecl.php.net(For Red Hat based systems you can use the php-pecl-mailparse package found in the DAG repository.)
* Set Max Filesize Upload PHP variable to 16MB or higher - Set the php.ini variable upload_max_filesize to larger than 16MB (higher for larger attachment support). Usually php.ini is located at /etc/php.ini. You will need to restart the web server to enable this change.

2) Download and extract @Mail WebMail Client Download the @Mail archive and extract it.

tar xvzf atmailphp5.tgz -C /tmp

Move the webmail directory under your web server's DocumentRoot, or VirtualHost directory (These can be found in your apache configuration file.)

mv /tmp/atmail/ /path/to/document/root/atmail/

Next, change the ownership of the directory to the web server user. This is required for @Mail to save configuration files via the web and used during the install process. For example:

chown -R nobody /path/to/documntroot/atmail/

3) Installation Wizard

You are now ready to access your website and begin the installation process. Point your browser to your webserver http://yourdomain.com/atmail/
@Mail Pre-Installation Check
At the @Mail Pre-installation check screen, you will be shown information any problems with needed server software and PHP settings. You may end up needing to make some changes to your /etc/php.ini file, or find that you need to install various software dependencies.

When you are ready, select Continue to proceed with the installation.

Step 1)

@Mail Select Language and License Agreement

Please select a default language and read through the license agreement. Select Yes I agree to the above license and Continue once you are happy with the license agreement and language.

If you experience troubles here and you are unable to proceed past Step 1, you will have to make some changes to the following files. After these changes have been made you will be able to continue with the installation.

/path/to/document/root/atmail/install/html/english/step1.phtml
/path/to/document/root/atmail/install/step1.php
/path/to/document/root/atmail/install/index.php

/path/to/document/root/atmail/install/html/english/step1.phtml

Find:

<select name="lang">
<option value="\">$name
</option>
</select>

Change to:

<select name="atmail_lang">
<option value="\">$name
</option>
</select>

/path/to/document/root/atmail/install/step1.php
Find:

if (isset($_POST['submit']) && isset($_REQUEST['lang']))
{
if (in_array($_REQUEST['lang'], $supportedLanguages))
$_SESSION['step1']['lang'] = $lang = $_REQUEST['lang'];
else
$errors['invalid_lang'] = true;

Change to:

if (isset($_POST['submit']) && isset($_REQUEST['atmail_lang']))
{
if (in_array($_REQUEST['atmail_lang'], $supportedLanguages))
$_SESSION['step1']['atmail_lang'] = $lang = $_REQUEST['atmail_lang'];
else
$errors['invalid_lang'] = true;

/path/to/document/root/atmail/install/index.php
>Find:

// Set our lang var if known
$lang = isset($_SESSION['step1']['lang']) ? $_SESSION['step1']['lang'] : 'english';

Change to:

// Set our lang var if known
$lang = isset($_SESSION['step1']['atmail_lang']) ? $_SESSION['step1']['atmail_lang'] : 'english';

Step 2)
@Mail SQL server setup
If possible use a non-privileged mysql account, not the default root user. The default database name is atmail. If this is a new installation, you should see check boxes that allow you to create the @Mail database and it's tables.
NOTE: If you are re-installing @Mail with an existing database make sure to remove any check mark in the database creation options.
Select Continue when you are ready to proceed.
Step 3)
@Mail SMTP and Admin Email Configuration
Next, you must define the SMTP hostname for Webmail to send outgoing messages. By default the localhost SMTP server is used, you may need to define another SMTP server if one is not running on the local server.
SMTP/Admin Email Selection
Make sure you have access to relay messages via the SMTP server and that the IP address of your server is allowed to send messages.
Next, define the administrative email-address, this address will be used in the WebMail interface to notify end users of who to contact for support.
Select Continue when you are ready to proceed.
Step 4)
@Mail Register Software License
You must register your copy of @Mail. Please follow the links to generate a new serial key so as to most accurately reflect this installation.
Select Continue when you are ready to proceed.
Step 5)
@Mail Securet the WebAdmin and @Mail
@Mail includes an administration panel which is used to control users, modify system settings, view logs and run system maintenance tasks. You should specify the username and password you wish to use for the WebAdmin panel. The installer will create an Apache .htaccess file to password-protect the directory.
4) @Mail installation is now complete.
For additional support, please visit our web site http://atmail.com/ - Or send us an Email : support@staff.atmail.com


Filed under: Installation, OS, PHP version — Stewart Bazley @ 11:09 pm


January 1, 2008

 Server optimization and @Mail

Below are some base suggestions on how to optimize a server running @Mail.

1) Set MaxRequestsPerChild in the httpd.conf between 100 -1000. This will force Apache threads to exit after serving X threads, useful for machines with limited memory. The more memory in the machine, the higher the MaxRequestsPerChild can be.

2) Tweak the wait_timeout in the /etc/my.cnf to expire any persistent database connections - http://kb.atmail.com/view_article.php?num=137

3) Upgrade the RAM in the machine. @Mail uses Mod_Perl which will use available memory to cache the scripts used by @Mail. The higher the memory, the better @Mail can perform under high-load.

4) Tweak the httpd.conf and disable and modules you don't need, since they are replicated for each process ( e.g mod_php, mod_rewrite, mod_dav, etc )

5) Load mySQL on it's own server , keep the front-end dedicated for @Mail.

6) Once the service grows you can distribute WebMail between multiple machines, to increase the overall performance - http://support.atmail.com/multiserver.html for details


Filed under: Installation — Ben Duncan @ 12:00 pm


 Locking Webadmin to an IP basis

Via the @Mail Webadmin you can optionally lock down access to a per IP basis.

This can be setup to block any IP's from accessing the Web-administration panel, and only allow your specified host.

To enable edit the file:

/usr/local/atmail/webmail/webadmin/.htaccess

Append:

order allow,deny
allow from 192.168.0.1 203.21.224.

Replace with your IP's as above. The example above will allow the Webadmin panel to be accessed from 192.168.0.1 or the 203.21.224.* network. Any other IP will receive the default Apache access-denied page.


Filed under: Installation — Ben Duncan @ 12:00 pm


 Updating Spam treatment for all users

When running the mail-server mode of @Mail, if Spam has become a problem and you automatically want to move all messages marked as Spam via Spamassassin to the users "Spam" folder, use the following SQL query:

mysql> update SpamSettings set value='trash' where preference='spam_treatment';

This will revert any previous settings for the Spam-treatment and move all Spam-messages to the users "Spam" folder.

Via the @Mail Webadmin > Filters > Filter Settings you can also define the default Spam-treatment for "new" accounts created on the system.


Filed under: Installation — Ben Duncan @ 12:00 pm


 Connecting WebMail via a different IMAP port number

Question:

We are running an IMAP server on a non-standard port ( not 143 ) and would like @Mail to access our server using Webmail.
How can we configure the port @Mail communicates to the IMAP server via?

>Answer:

For @Mail PHP 5.x

By editing the following files

/usr/local/atmail/webmail/libs/PEAR/Net/IMAP.php
/usr/local/atmail/webmail/libs/PEAR/Net/IMAPProtocol.php

1) In the file : /usr/local/atmail/webmail/libs/PEAR/Net/IMAP.php
Find:

function Net_IMAP($host = 'localhost', $port = 143)

Replace 143 with desired port number.

2) In the file: /usr/local/atmail/webmail/libs/PEAR/Net/IMAPProtocol.php
Find:

function Net_IMAP($host = 'localhost', $port = 143)

Replace 143 with desired port number.

Save the changes and @Mail will now use the port specified via IMAP.


Filed under: Installation — Stewart Bazley @ 12:00 pm


 Compiling Exim and Courier on an Intel Mac OS X

When compiling Exim or Courier in an Intel Mac OSX environment, you might see the following error:

ld64-59.3 failed: symbol(s) not found

This is caused by MySQL's flags being set for both the ppc and x86_64 architecture. To fix, just do the following:

- open up /usr/bin/mysql_config:

- find the line:

ldflags=' -arch ppc64  -arch x86_64 -pipe'

- change this to:

ldflags=' '

- then, find:

cflags="-I$pkgincludedir -O3 -fno-omit-frame-pointer  -arch ppc64  -arch x86_64 -pipe " #note: end space!

- change to:

cflags="-I$pkgincludedir -O3 -fno-omit-frame-pointer  " #note: end space!

- retry the installation afterwards.


Filed under: Installation — John Contad @ 12:00 pm